The phrase “dyed in the wool” describes someone who won’t budge. Someone so fixed in their beliefs that there’s no point trying to argue them out of it. The idiom didn’t start as a metaphor, but comes from a manufacturing technique: wool dyed while it’s still loose fiber, before it’s spun into yarn. Color applied at that stage holds more stubbornly than color added later to thread, fabric, or a finished garment.
Politician and lawyer Daniel Webster popularized the phrase in the mid-19th century, using it to paint a political opponent as unyielding as the dye in unspun wool.
Over the last few weeks, I’ve been talking about the chemistry of how dye bonds to fiber and how different fibers call for different dye classes. That’s only half the story. The other half is timing. At what point in a garment’s life does the dye actually go in?
The timing of adding dye can explain why two shirts of the same color can age and fade in completely different ways. It’s worth understanding these techniques and how they impact the resulting garment.
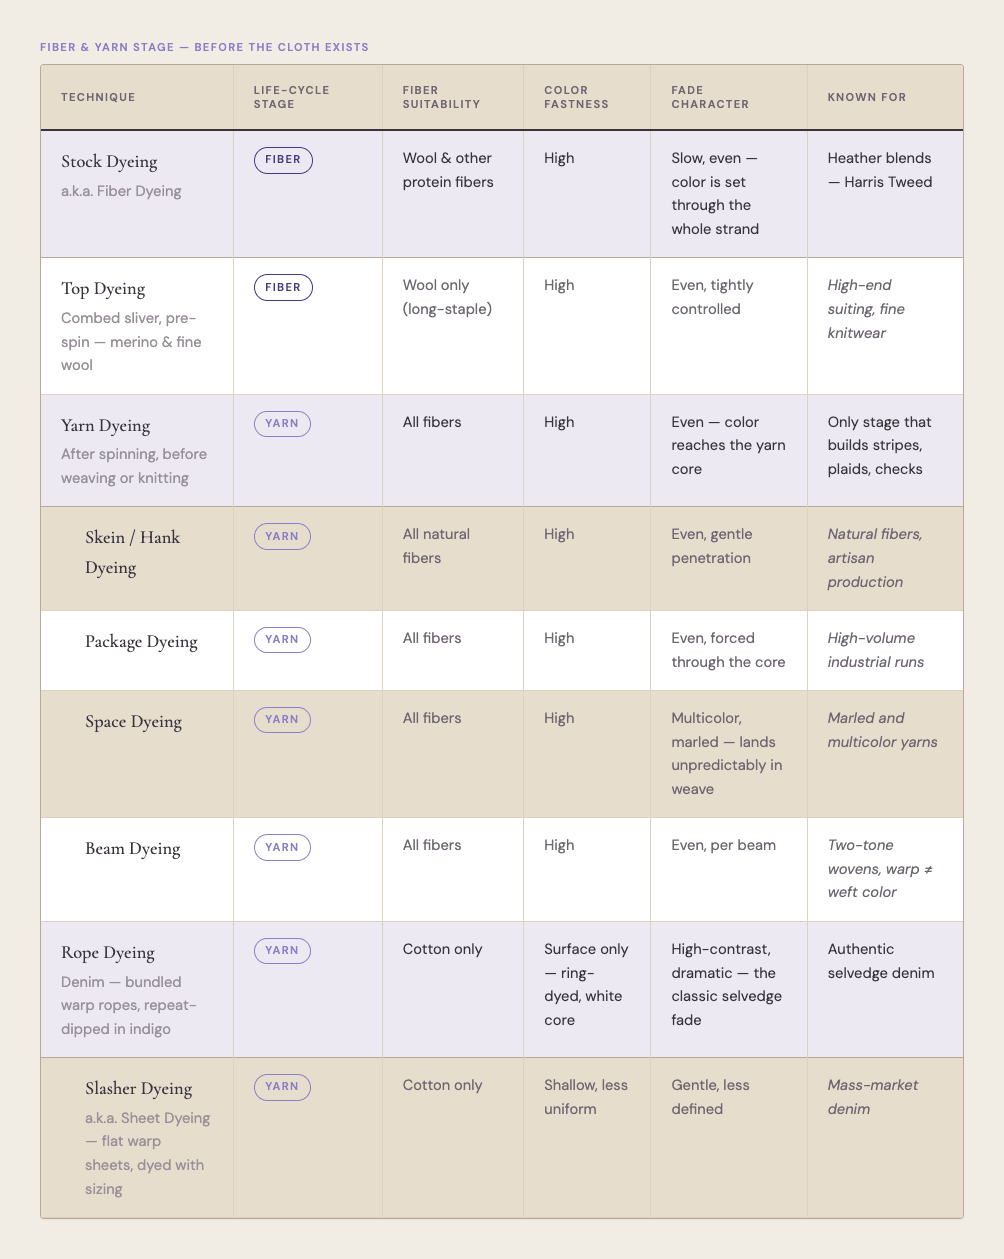
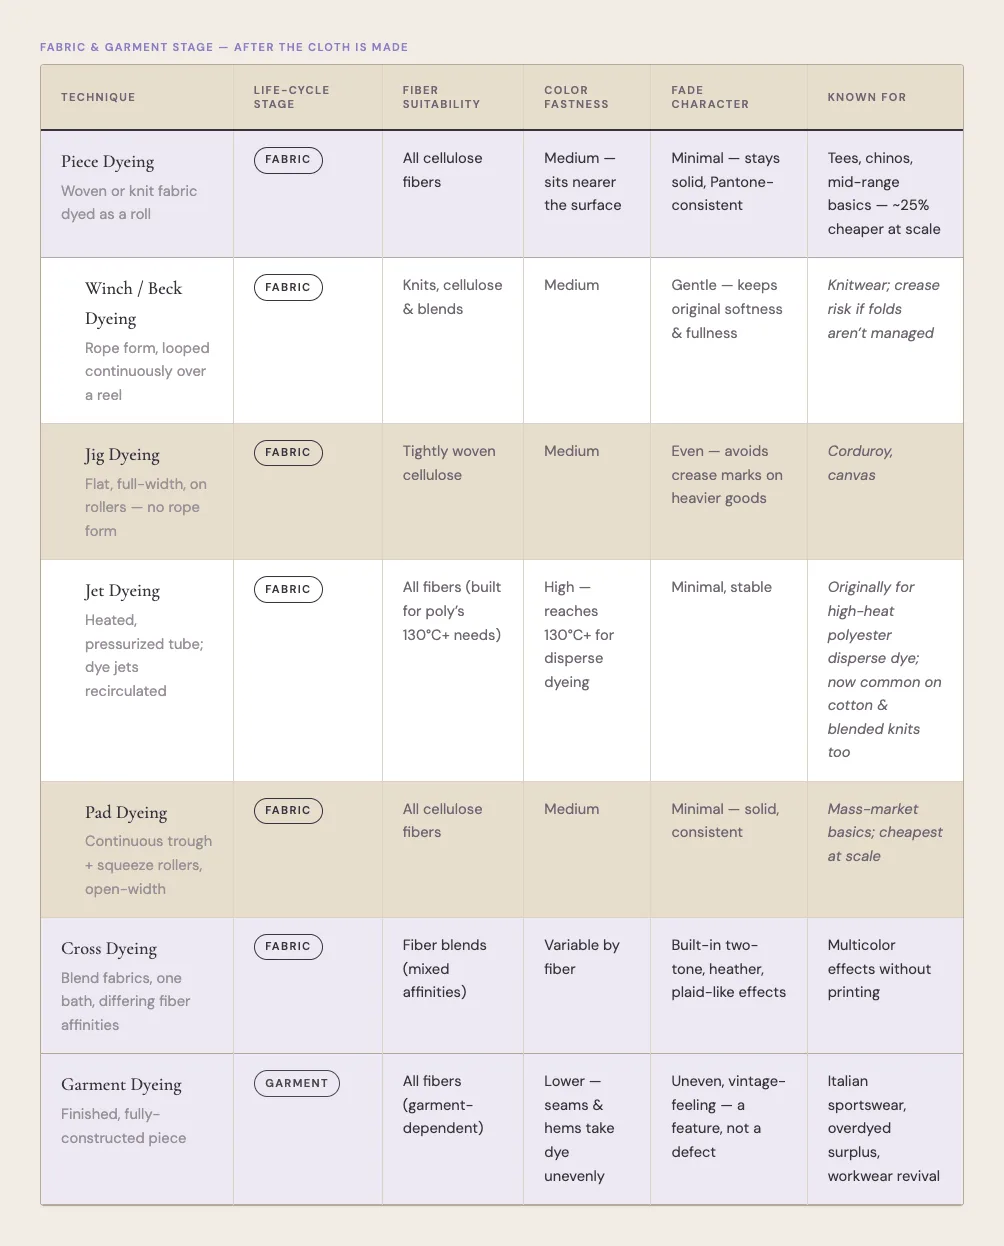
Unlike the first two pieces in this series, this one is more of a quick-reference guide than a long-form essay. I’m going to walk through each dyeing process from earliest to latest in the garment’s lifecycle, with a summary comparison at the top and the details below.
Stock Dyeing
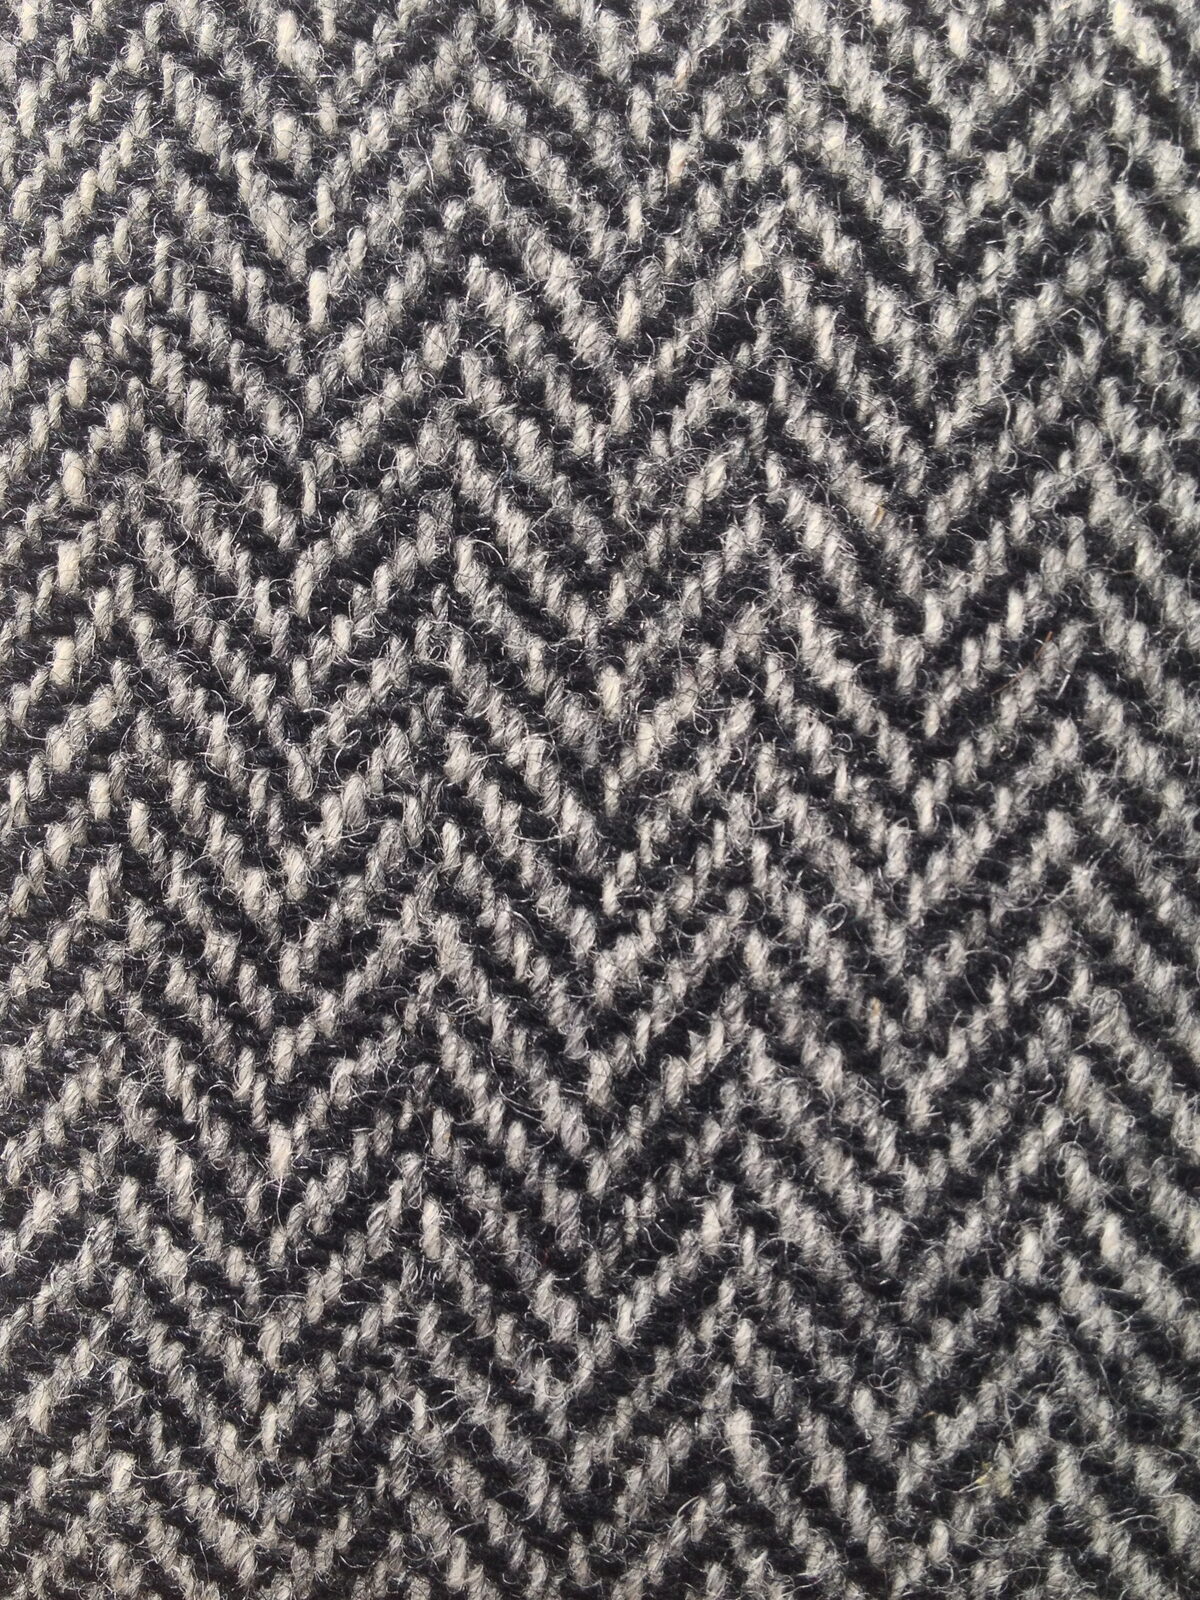
Also known as fiber dyeing, this process involves dropping loose, unspun fiber into a pressurized vessel and soaking it thoroughly before any twist is introduced. Nothing stands between the dye and the fiber yet: no yarn structure, no weave, nothing for the color to fight past to get in. This technique is what “dyed in the wool” is describing. Dyed and undyed fiber, carded (detangled and cleaned wool) together before spinning, produce heather and tweed effects that can’t be achieved with a single dye bath. Harris Tweed’s depth comes from this technique: black and natural white fibers, blended before the threads are formed.
Top Dyeing
A more specific version of the same idea, top dyeing is specific to long-staple wool. Top dyeing utilizes combed, parallel sliver wool. A sliver (rhymes with “diver” in textile terminology) is a loose, untwisted rope of fiber, the intermediate stage between carding/combing and actual spinning. “Parallel” means the fibers have been combed straight so they lie mostly in the same direction, unlike carded fiber, which is more randomly jumbled.
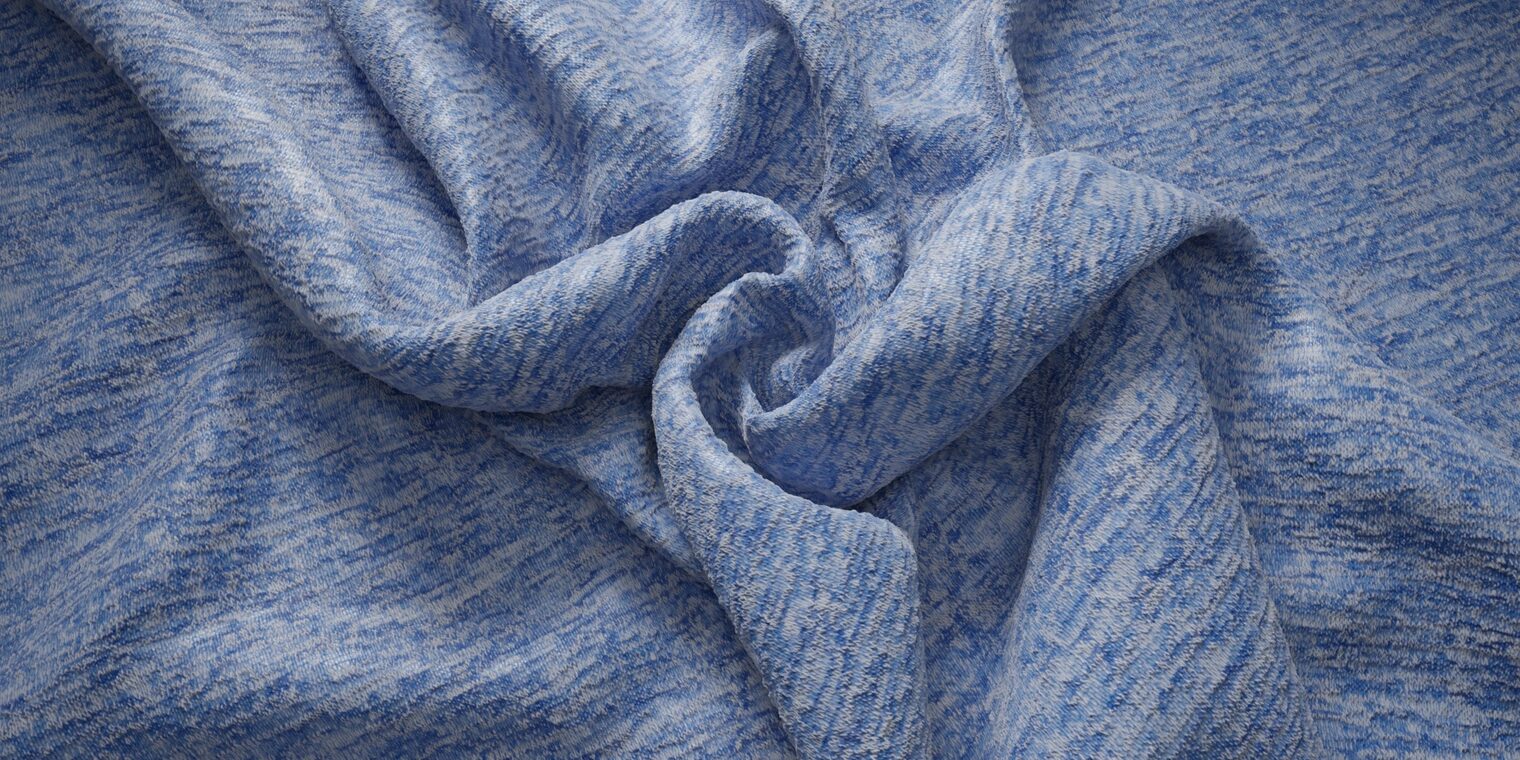
When all tops are dyed the same color, it produces a deep, consistent shade valued in fine suiting. When tops of different colors are separately dyed and then blended before spinning, the resulting yarn has a marl or melange appearance. In that case, the top dyeing enables the color variety, while the blending creates the visual effect.
Yarn Dyeing
In yarn dyeing, the fiber has already been spun into yarn but not yet turned into fabric. Yarn dyeing is the only technique that allows stripes, plaids, and checks to be built in: the color has to be part of the warp and weft before weaving, not just printed on afterward.
Hank dyeing, package dyeing, space dyeing, and beam dyeing are all forms of yarn dyeing.
Hank dyeing
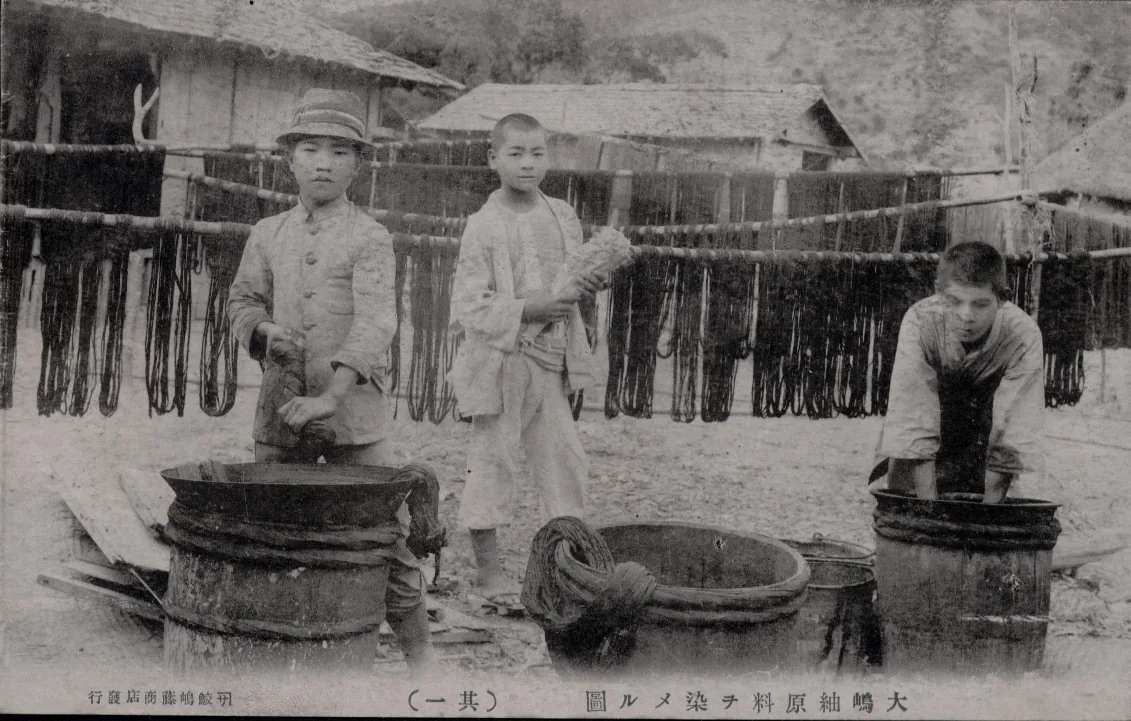
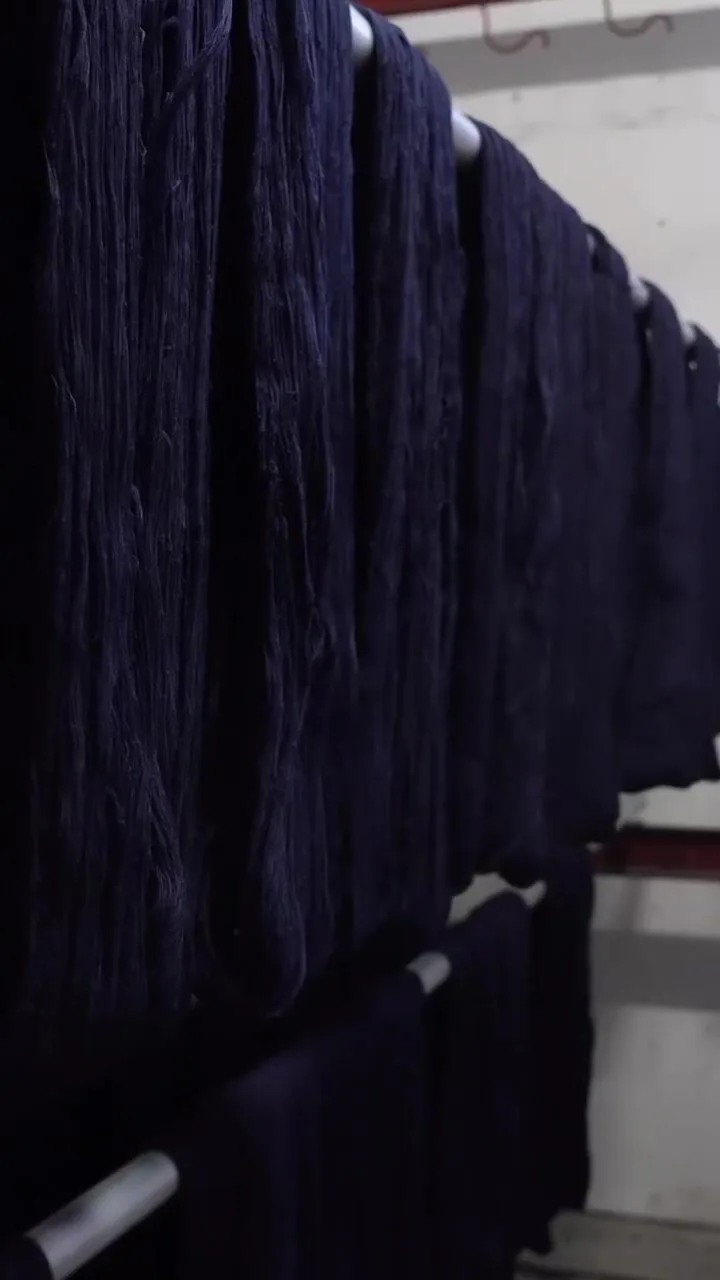
Also known as skein dyeing, this method involves winding yarn into loose hanks or skeins (open loops of fabric) that are hung over a bar and fully submerged in an open dye bath. Instead of mechanically agitating the yarn (which would tangle or felt it), a circulation pump moves the dye solution through the loose loops.
Famous for its applications with denim and indigo, the yarn usually undergoes repeated dip–rinse–redip cycles, sometimes extending to 48 hours, until the target color is achieved. Then it’s steamed to fix the dye and set the color.
Because the yarn is never compressed or wound tightly, the dye reaches every strand evenly, and the fiber keeps a lofty, soft feel. That’s why this method dominates hand-knit yarns and artisan wools, where feel is as important as the color.
Package dyeing
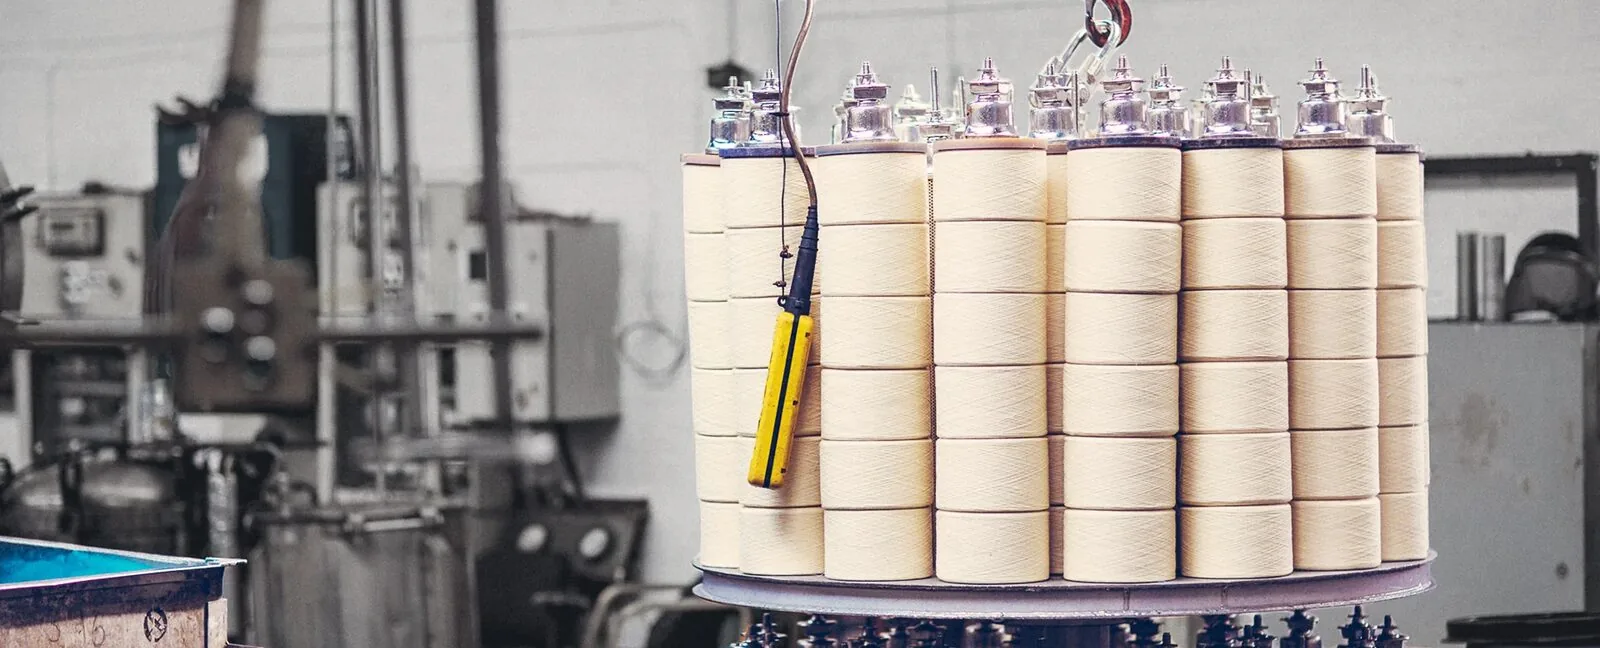
In package dyeing, yarn is wound onto a perforated tube (the “package”) at a very specific, controlled density: dense enough to hold its shape, loose enough for dye solution to flow through.
Multiple packages are stacked onto a spindle and compressed or bolted together into a single column. That column goes into a pressurized vessel where dye solution is forced through from the inside out, then periodically reversed to flow from the outside in. The compression onto the package leaves a mark, though. Yarn wound tight on a package comes out slightly firmer and flatter than yarn dyed loose in a hank. That doesn’t matter much for woven fabrics, so package dyeing is the standard way to color yarn for woven garments at scale.
Think of it as an industrial-scale, computer-controlled version of what hank dyeing achieves through long soak times. The forced, bidirectional circulation is a replacement for time and hand agitation.
Space dyeing
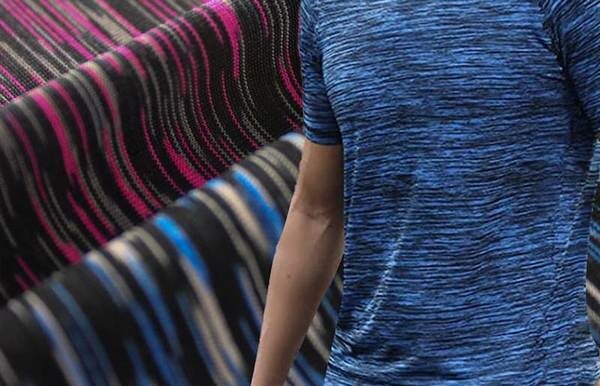
Here, most commonly, yarn is first knitted into a tube, printed with color using engraved rollers, and then unraveled back into yarn. Because dye can’t penetrate where the yarn crosses over itself inside the knit structure, unraveling reveals alternating dyed and undyed segments. The “spacing” in space dyeing is a side effect of the knit geometry.
The payoff is controlled irregularity: color that shifts too unpredictably to read as a pattern. You see it in marled socks and flecked sweaters that look hand-dyed at a machine-made price. It’s the choice when a maker wants visual texture without the cost of blending separately dyed fibers back at the stock stage.
Beam dyeing
In beam dyeing, warp yarn is wound onto a large perforated beam, laid out in parallel, in exactly the order it will be used for weaving. The whole beam then goes into a dye tank where liquor is pumped through the perforations, alternating in and out under pressure and heat.
There are two main variants:
- Beam dip dyeing: The beam is fully submerged.
- Beam pad dyeing: Dye solution is forced through under pressure without full immersion, closer to padding (see below) than soaking.
The advantage is more than just even color. Because the yarn is wound under tension and doesn’t need to be rewound or re-ordered afterward, the beam goes straight to the loom. That preserves the exact warp sequencing, which is crucial when the warp and weft need to end up in different colors.
In the finished garment, the two directions of the weave disagree about color, such as in end-on-end shirting, and iridescent fabrics that flash a second color when they move. That effect only works if every warp thread holds its exact position from dye tank to loom, which is precisely what the beam preserves.
Rope Dyeing
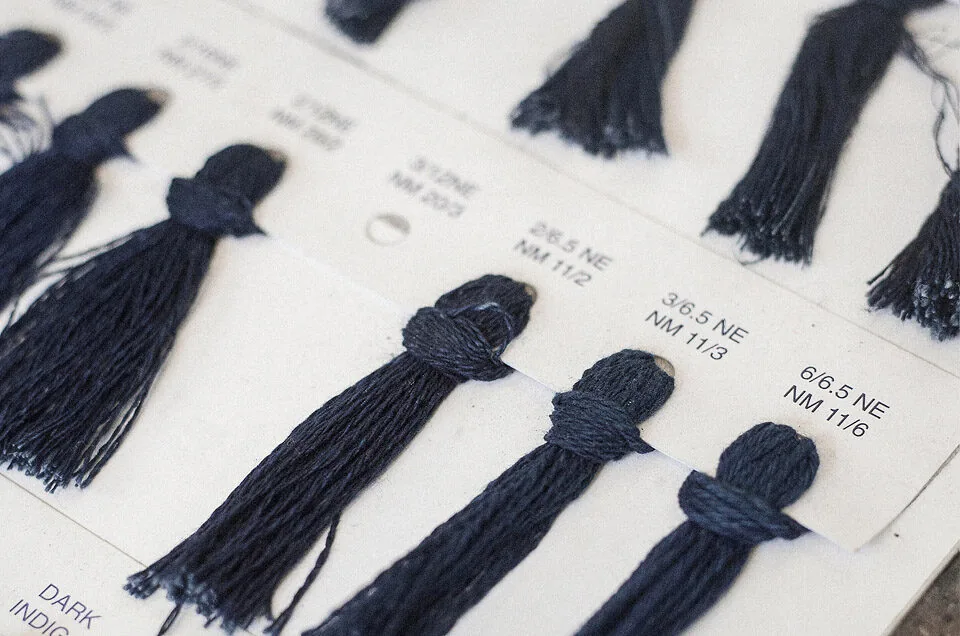
Rope dyeing is used for denim. Bundles of several hundred warp yarns are gathered into a thick rope, dipped into indigo, pulled out to oxidize, and then dipped again, sometimes a dozen times or more.
Each dip is short, so the dye mostly coats the surface of each yarn, leaving the cotton core white. That’s the structure behind every dramatic, high-contrast raw denim fade. Abrasion doesn’t create new color; it just exposes the white core that was sitting a fraction of an inch beneath the surface. I talk more about this process in Part 1 of this series and on Instagram.
Slasher dyeing
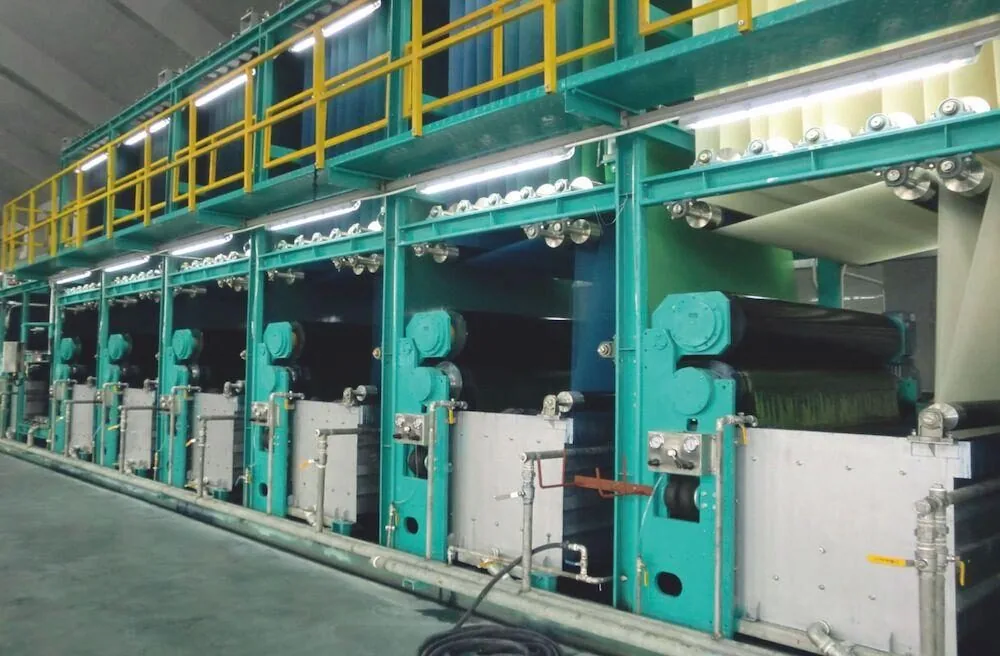
Like rope dyeing, slasher dyeing is used for denim, but it’s a continuous, high-speed line process rather than a batch process. The yarn unwinds flat, passes through caustic wash boxes to prepare the fiber, then runs through a series of five or more indigo troughs.
Each trough repeats the same three-step cycle used in rope dyeing:
- Impregnation: The yarn dips into the leuco-indigo bath.
- Squeeze: Rollers press out the excess solution.
- Oxidation: The yarn is exposed to open air, and the leuco-indigo turns blue.
The key difference from rope dyeing is geometry. Because the yarn is flat and spread out rather than bundled into twisted ropes, each pass exposes it for less time, and the dye barely gets past the surface. Slasher-dyed denim tends to fade to a shallower, duller shade as a result.
Piece dyeing
Here, a finished bolt of woven or knit fabric is dyed as a roll before it’s cut into garments. Piece dyeing is the industrial default for solid colors at scale: efficient, consistent, and Pantone-matchable.
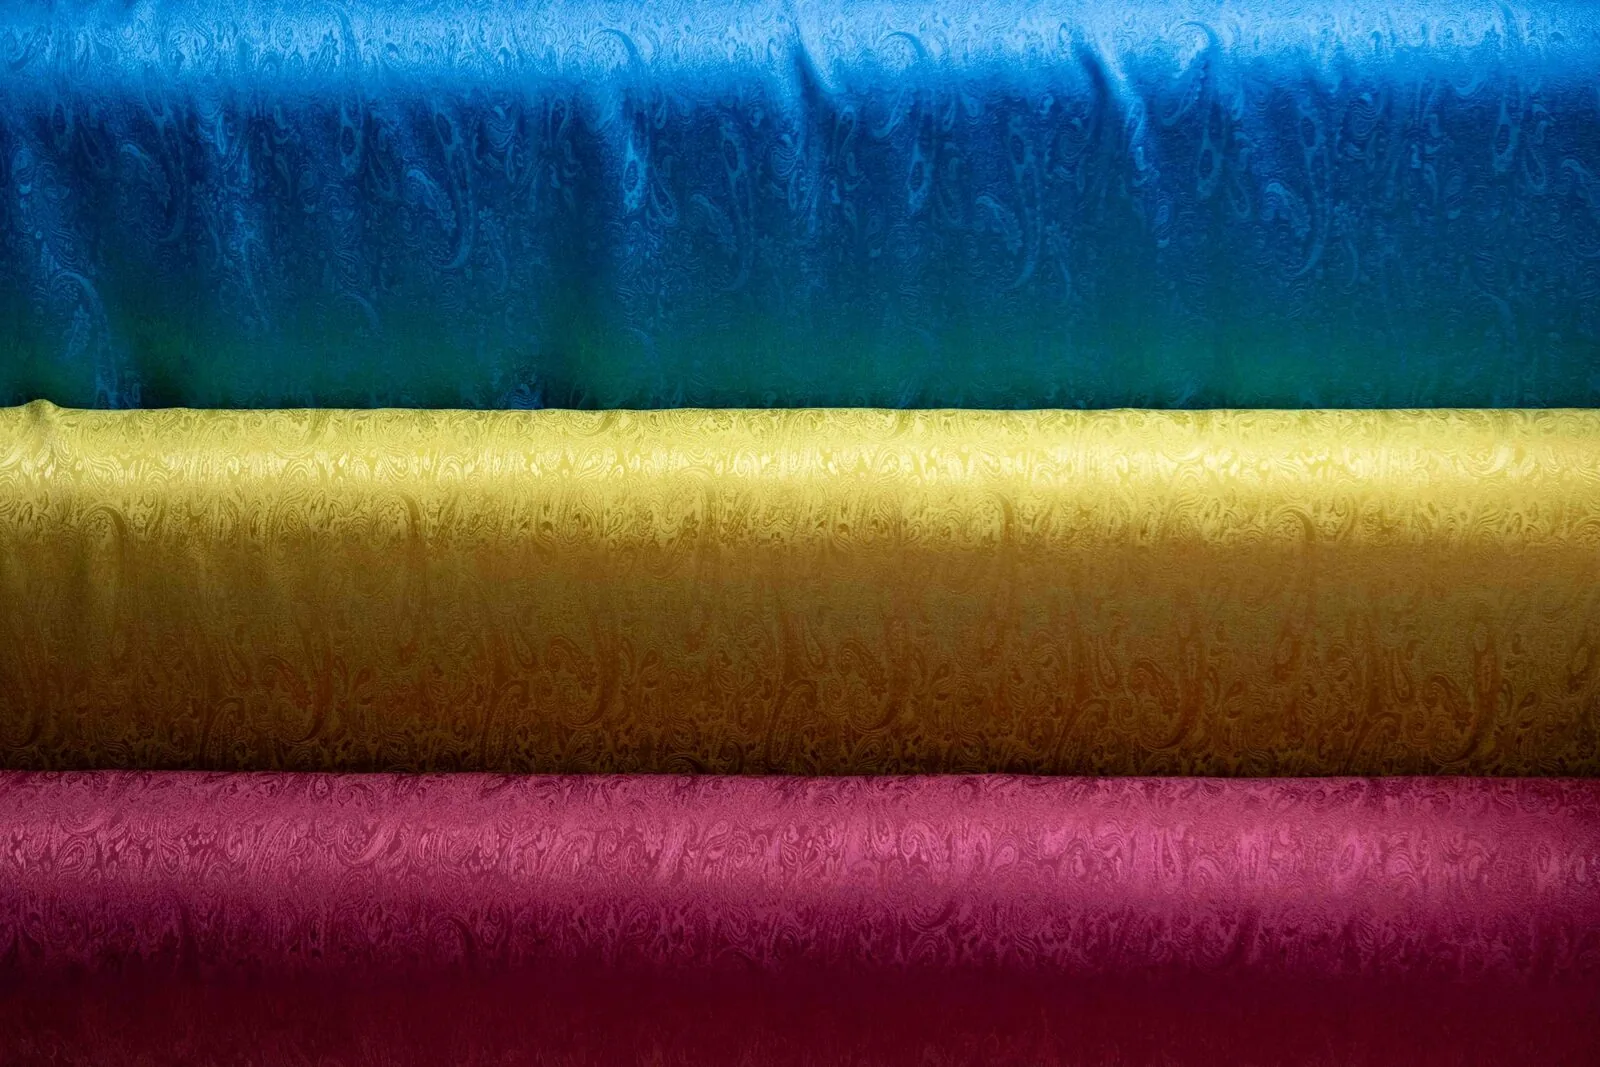
Most mid-range basics are piece-dyed. The color usually sits shallower than anything dyed at the yarn stage, and it tends to fade more evenly and less dramatically.
There are four main methods of piece dyeing:
Winch/beck dyeing
The bolt of fabric gets sewn end-to-end into a loop and loosely bunches into “ropes”. The fabric runs in rope form through the dye bath, looped continuously over a reel. This is a similar idea to rope-dyed yarn, just with fabric instead of yarn. It’s gentle and used mainly for knits. The fabric keeps its original softness and fullness because it’s never held under much tension.
Because it’s bunched into a rope, though, uneven folds can leave crease marks if the fabric isn’t handled carefully in the bath.
Jig dyeing
Same basic idea as winch dyeing, but the fabric is held flat and at full width on rollers rather than bunched into a rope. Jig dyeing is the standard for medium-to-heavy, tightly woven fabrics like corduroy and canvas, precisely because keeping the cloth flat avoids the crease-mark risk that rope form carries on heavier goods.
Jet dyeing
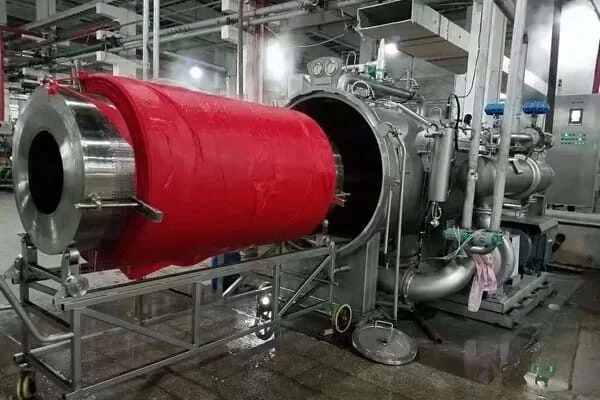
The fabric sits in a heated, pressurized tube while jets of dye solution blast through it at high pressure, continually recirculated as the fabric moves along.
Jet dyeing uses the high temperatures required for many synthetic fibers, but it can also be used for natural fibers when those conditions are appropriate. This is the technique behind most solid-color synthetics and blends such as performance fleece, technical shells, and poly-cotton basics. It’s chosen when the fiber demands high heat and the order demands speed. The result is even, saturated color on fabric that never fades.
Pad dyeing
The fabric runs through a dye trough, then between heavy squeeze rollers that force the dye in and push the excess out, all in open width. There’s no batching and no looping, just continuous throughput.
This is the efficiency workhorse behind mass-market basics. That efficiency is the main reason piece dyeing is the cheapest option at industrial scale. The color sits shallowest in the fabric of any method in this guide, which is fine for a garment meant to be replaced, limiting for one meant to be kept.
Garment dyeing
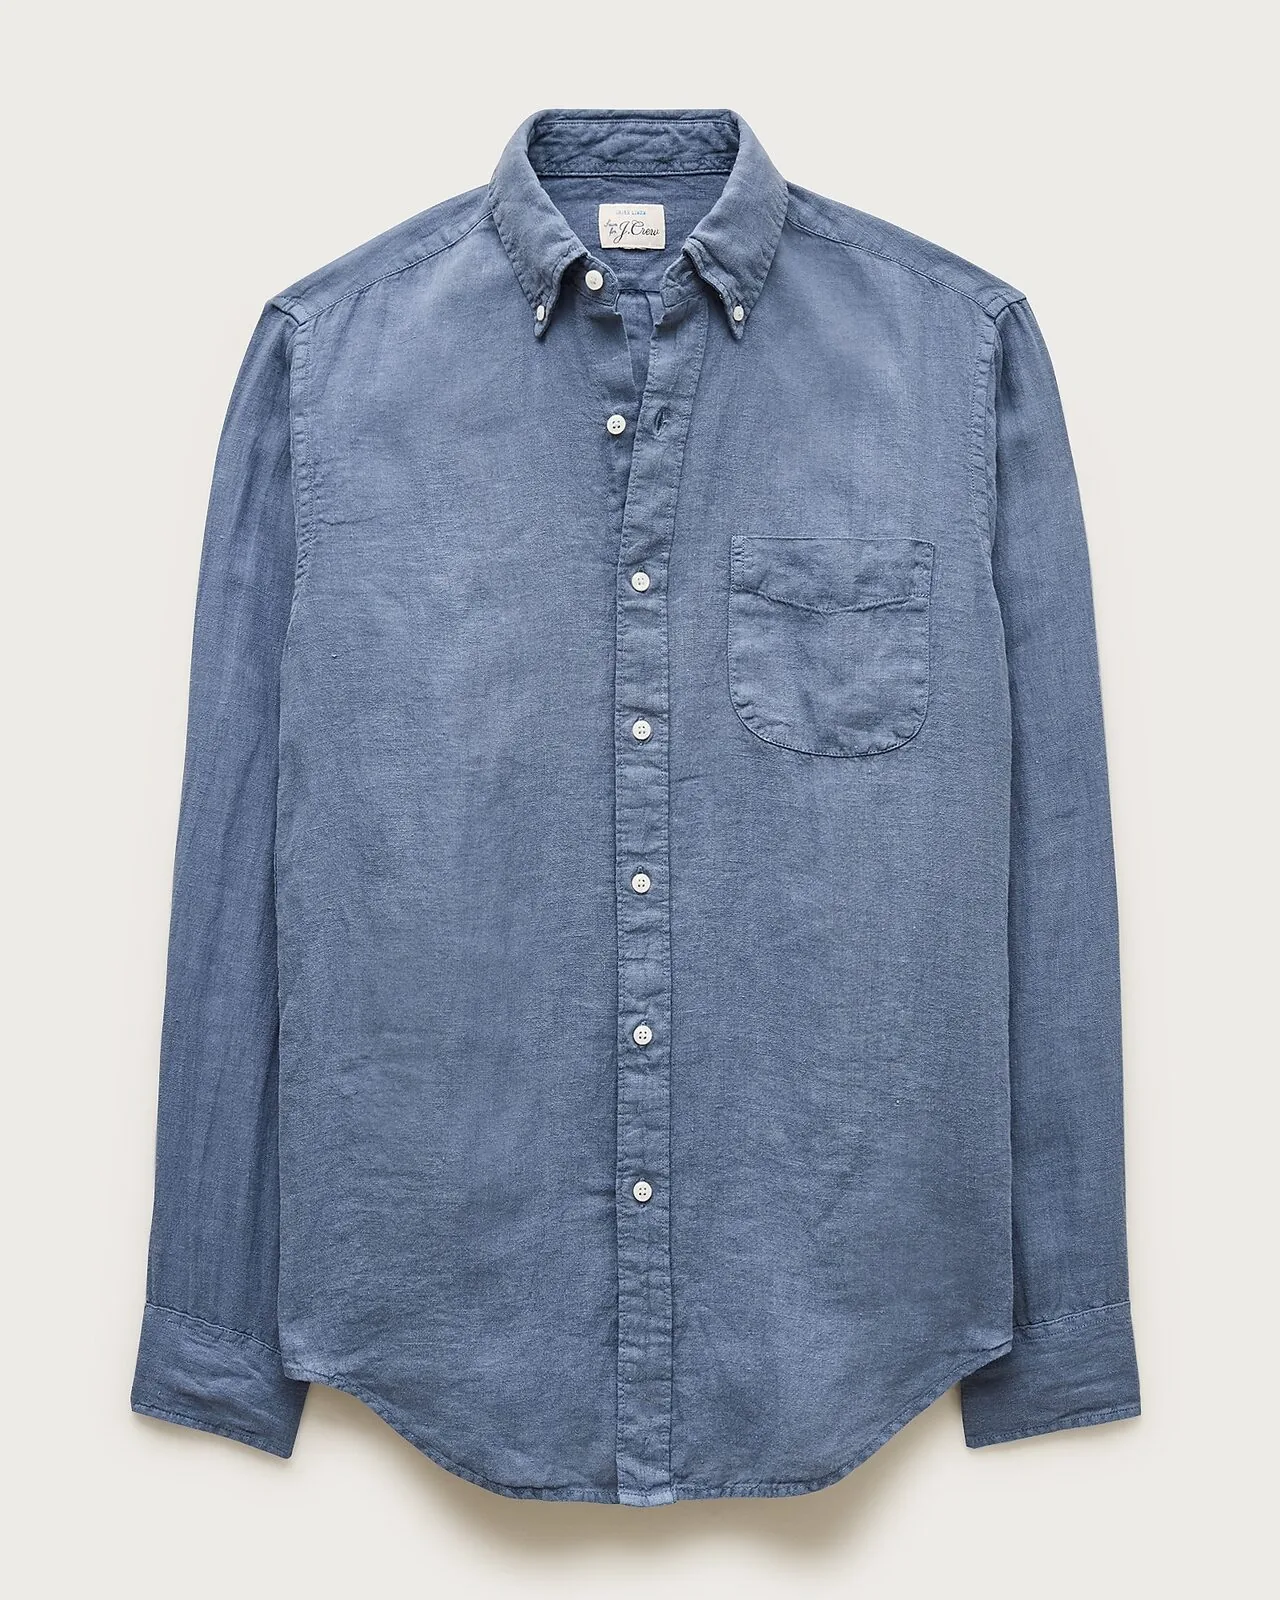
Garment dyeing is the last stop in the chain. The piece is fully sewn — seams, pockets, stitching, everything — before it goes into the dye bath.
This isn’t really a shortcut so much as a different goal. Seams and stress points take dye differently than flat panels, so the finished garment comes out with an irregular, already-worn character on day one. It’s also the only method that lets a maker defer the color decision until the last moment. The maker can cut and sew in undyed cloth, then dye to order once they know what’s selling. The irregular character is aesthetic, but the flexibility is good for business.
Stone Island built an entire identity on this, dyeing fully constructed jackets so the color pools differently at every seam and stress point. No two pieces leave the bath identical, and that’s the point.
Timing, depth, and fading
The earlier the dye meets the fiber, the fewer structural obstacles — twist, weave, seams — stand between the dye and full, even penetration. Depth of penetration is depth of color, and depth of color determines whether something fades gracefully over the years or looks tired after a season.
Late-stage dyeing isn’t bad. It simply trades permanence for character, on purpose. There’s nothing wrong with that trade as long as you are making it intentionally.
“Dyed in the wool” survived as an expression because people understood a universal truth: what goes in early tends to stay - whether that be in fabric or life philosophy. But textiles also remind us that permanence is only one kind of beauty. Sometimes the most interesting garments are the ones designed to change — to absorb wear, movement, and time into their color. One method is not superior to another, it just depends on what life the manufacturer wants the garment to take on.
Next in the series: the piece Part Two promised. Cochineal, madder, kermes — the red dyes worth fighting over, and the people still utilizing them today.